It all started when I realised I could connect my netbook to my hifi to play music, and then sit back on the sofa and control the netbook from my laptop using VNC. Wonderful! I’m lazy by nature and changing the CD is such a drag. I found I listened to so much more music this way, and really enjoyed it. So I began looking for a more elegant, and more importantly, better sounding solution. This is what I came up with…
Overview
This is going to be a very techy article, so if that’s not your thing, turn away now.
I’m using an Asus EeePC 701 that I picked up on ebay for £71 to play the music. It basically has Ubuntu installed, but tweaked to be as minimal as possible. Music is on the file server upstairs, mostly as FLAC files. The EeePC runs Music Player Daemon (MPD), a music server that can be remotely controlled across the network by a variety of clients. A very minimal GUI is loaded at startup with the Gnome Music Player Client (GMPC). Starting everything is as simple as pressing the power button—no logging in or starting things up. Also on the EeePC is Remuco, which allows remote control from my Nokia phone.
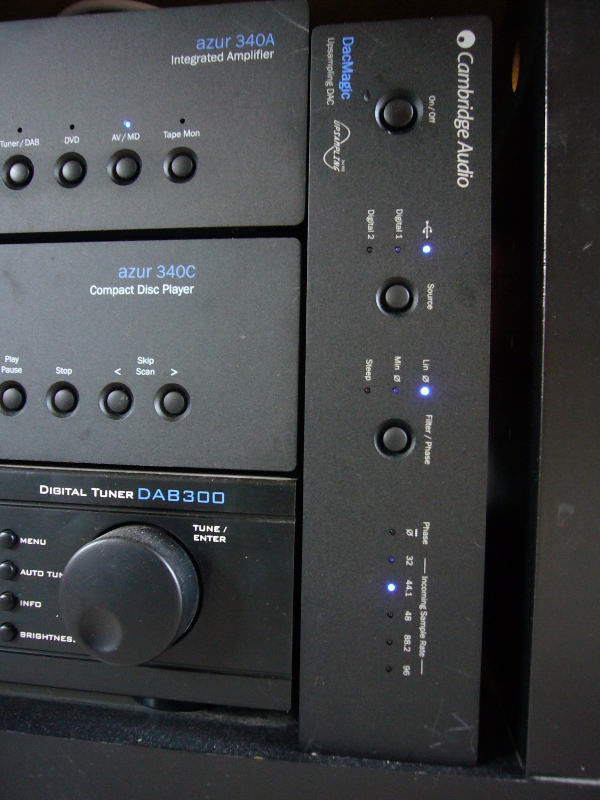
Rather than relying on the ropey internal sound card, the digital signal is taken from the USB port to a Cambridge Audio DacMagic upsampling DAC, and on to my existing Cambridge Audio Azur 340A amp.
The EeePC
 I chose the Asus EeePC 701 for a number of reasons. I have an EeePC 901 and I’ve been very pleased with it, so I trusted the pedigree. It has a solid state hard drive, so there is no clattering drive noise to interfere with listening. It’s small and fits easily on the shelf next to the hifi. And second hand ones come up regularly on ebay at a reasonable price.
It might have been a bit of mistake to be honest. I hit a couple of problems. One is that it seems to run hotter than the 901, so the fan comes in more, but to be fair it’s not really noticeable. More of an issue has been the wireless chipset – the Realtek RTL8187SE. Support for this under linux seems incomplete, and though it works fine with NetworkManager once a user is logged in, I couldn’t persuade it to come up at boot time. Consequently, I ended up investing in a Zyxel G-202 USB wireless adapter instead. I did manage to kludge the internal thing to work using NetworkManager, but that meant the network wasn’t started until late in the boot process, which delayed various other things. Switching to the well supported Zyxel adapter shaved 20s off the boot time, taking it down from 65s to 45s.
The DAC Magic
 The Cambridge Audio DAC Magic is a lovely piece of kit. It’s an upsampling DAC with more acronyms in it’s specification than you can shake a stick at. Even I’m not geeky enough to understand what half of them mean. But it sounds great, and what else matters? Well, the fact that it does what I need matters actually, which is to take USB input from a PC. And the fact that it seems to be fairly easy to set up a linux based machine to recognise it as a sound card.
Getting started
My starting point was to install Ubuntu Netbook Remix on the EeePC. A slimmer distro might have made sense, but I figured UNR has been tweaked for various netbooks and I might save a fair bit of messing about with hardware drivers if I started with it.
Having installed UNR I created a second user named ‘music’, as an ordinary desktop user. This will be the user who will automatically log in to the EeePC. I’ll keep my own account for administration.
I then used Synaptic Package manager to install mpd, gmpc, gmpc-plugins and remuco-mpd—the basis of the music system. I needed a couple of other packages too. nfs-common enables me to access the music stored on the fileserver upstairs; and mingetty will help me to automate some login tasks.
The aim was to have a system that can be turned on with nothing more than a touch of a button, and that boots fairly quickly, bringing up as little of the GUI as possible. Various suggestions were made to me about session files and using gdm, but I found it actually quite difficult to use gdm and not get a lot of extra desktop guff. So I gave up.
Instead, I disabled gdm altogether by moving its upstart file:
# mv /etc/init/gdm.conf /etc/init/gdm.conf.disabled
Now the machine will boot to a console login prompt. The next job is to get it to login. This is where mingetty comes in. Open /etc/init/tty1.conf and edit the ‘exec’ line to read
exec /sbin/mingetty --autologin music --noclear tty1
Now you should have a machine that will automatically login the user ‘music’. You can still login as another user by hitting Alt+F2 to bring up an alternative console (tty2). You can then start the full desktop GUI by typing
# startx
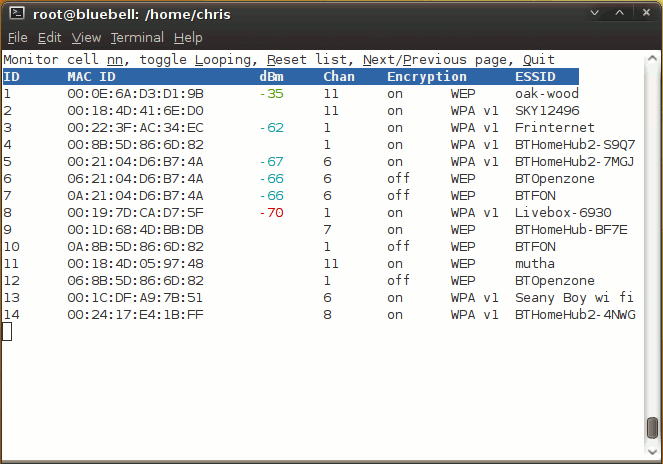
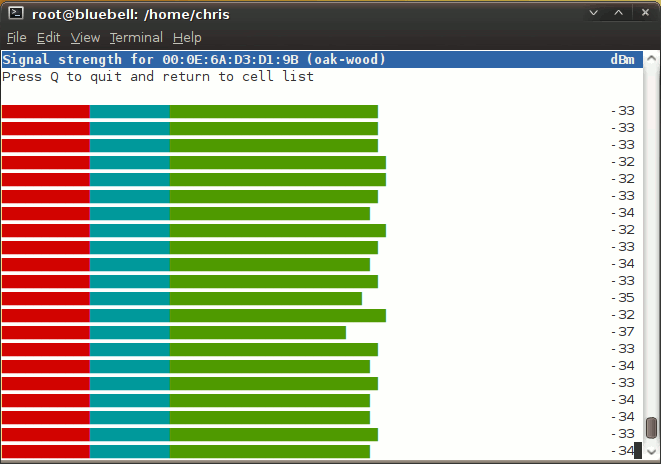
Bringing up the network
The simple way is to configure your wireless network in NetworkManager and then check the “Available to all users” box. NetworkManager won’t start a wireless network until a user logs in it seems, but a console login will do the trick. The trouble with this approach is it delays the start of the network, and I found that in order for things to work I had to be sure the network was up and the remote directory with all the music in mounted before starting MPD. So I looked for a way to start the network earlier.
As I mentioned, this proved problematic with the built in wireless card, and I had to resort to a USB wireless adapter. Having used ifconfig to establish that this was seen as wlan2, I edited /etc/network/interfaces
# The loopback network interface
auto lo
iface lo inet loopback

# The primary network interface
auto eth1
#iface eth1 inet dhcp
auto wlan2
iface wlan2 inet dhcp
wireless-essid <yourssid>
wireless-key <yourhexkey>
wireless-mode managed
wireless-channel <yourchannel>
and bingo! The network comes up early in the boot process. Of course, this assumes WEP security on the wireless network. If you need WPA or something else you’ll have to search further…
The network share
Connecting to the network share should be as simple as putting the appropriate entry in /etc/fstab. Unfortunately, it wasn’t.
The problem seems to be that /etc/fstab is processed before the wireless network has finished coming up. It turned out to be fairly critical that things are done in the right order, and that one thing finishes before the next starts. Otherwise odd things happen.
- Start the network
- Mount the network share
- Start MPD
- Start remuco-mpd
So the entry in /etc/fstab is flagged ‘noauto’ and ‘user’. It is not mounted automatically at boot, but by a script (we’ll come to that) that runs once the network is up. In my case my fileserver is at 192.168.37.8 and it exports /home/shared via nfs. I’m going to mount this at /network/shared on the EeePC, so I have this in /etc/fstab
192.168.37.8:/home/shared /network/shared nfs noauto,defaults,user,ro,bg 0 0
Setting up MPD
Configuration of MPD is done mainly by editing /etc/mpd.conf. The distribution includes sensible defaults for most things, and plenty of comments. You’ll need to set music_directory to the directory beneath which all your music is stored. Also check the value of bind_to_address. Do not set this to ‘localhost’ if you want to able to control the system remotely. I simply commented this line out, as the default is to bind to all available addresses.
Configuring MPD to output to the Cambridge Audio DAC magic proved to be a doddle. On plugging in the USB cable, the DAC magic was recognised by ALSA and assigned as card 1 (the onboard card gets slot 0). You can check which card has which slot with
aplay -l
All it takes to get MPD to output to the DAC Magic is this in the audio output section of /etc/mpd.conf:
audio_output {
 type        "alsa"
 name        "DAC Magic"
 device        "hw:1,0"
 mixer_device    "default"    # optional
 mixer_control    "PCM"        # optional
 mixer_index    "0"        # optional
}
The next thing to do is to disable MPD. I know, that sounds weird. It’s back to this problem of the order that things are done. By default MPD is configured to start automatically at boot time. The problem is, it gets rather unhappy if it is started when music_directory isn’t there yet. So we’ll stop it from starting at boot, and start it later from a script.
sudo update-rc.d mpd disable
Starting things up
Now it’s time to consider how to start everything up in the right order. This is the ugliest bit of the whole set up. Because my music is on a fileserver upstairs in the office I need the network to be up before I can really do much else. Fortunately, Ubuntu provides a way to run scripts in response to the network coming up—simply place a script in /etc/network/if-up.d
This is the script I used. It is quite specific to my set up, so you’ll need to go through and change stuff. Basically, it runs only when the wireless network comes up and then uses a series of while loops to wait until things are ready before moving to the next stage.
#!/bin/sh

# if the interface coming up isn't our wireless card,
# bail out (otherwise the script runs when the loopback
# interface comes up, which isn't useful!
if [ "$IFACE" != "wlan2" ];
then
 exit 0
fi

# wait until we're sure the network is up
NET=$( ( ifconfig | grep 192.168.37 ) 2>/dev/null )
echo -n "Waiting for network ."
while [ "x$NET" = "x" ];
do
 sleep 1
 echo -n "."
 NET=$( ( ifconfig | grep 192.168.37 ) 2>/dev/null )
done

echo ""

# check if the music directory is available yet. If not mount
# the network share
if  [ ! -d /network/shared/HiFiMusic ]
then
 echo "Mounting /network/shared"
 mount /network/shared
fi

# Wait for the music directory to appear
echo -n "Waiting for music directory to be available ."
while [ ! -d /network/shared/HiFiMusic ];
do
 sleep 1
 echo -n  "."
done
echo ""

# start MPD
/etc/init.d/mpd start
The Graphical User Interface
For the shiny user interface I installed GMPC – the Gnome Music Player Controller. For the purpose of starting a single program, maximised, the windows manager distributed wit Ubuntu Netbook Remix (metacity) is not ideal. So I used Matchbox, a windows manager designed for embedded devices. Start by installing it:
sudo apt-get install matchbox-window-manager
Next we create an .xinitrc script for our music user. Create /home/music/.xinitrc and add:
#!/usr/bin/env bash
/usr/bin/matchbox-window-manager -use_titlebar no &
/usr/bin/gmpc
Now we should be in the position where running ‘startx’ as the music user will not launch the whole Ubuntu desktop, but just GMPC, maximised and with no title bar.
The loose ends
All that is left to do now is to get the GUI to start automatically, and to start remuco. Remuco is another fussy program—it won’t start if MPD is not already running. These final points are covered by editing music’s .bashrc file, /home/music/.bashrc. We add to the end of this file a while loop to ensure that MPD is running, a call to remuco-mpd and finally, run startx:
echo -n "Waiting for MPD to start *"
while [ ! -f /var/run/mpd/pid 2>/dev/null ];
do
 sleep 1
 echo -n "*"
done

echo ""
sleep 2
/usr/bin/remuco-mpd &
startx
OK, that should be it. Restart the EeePC and it should load everything and start the GUI music player.
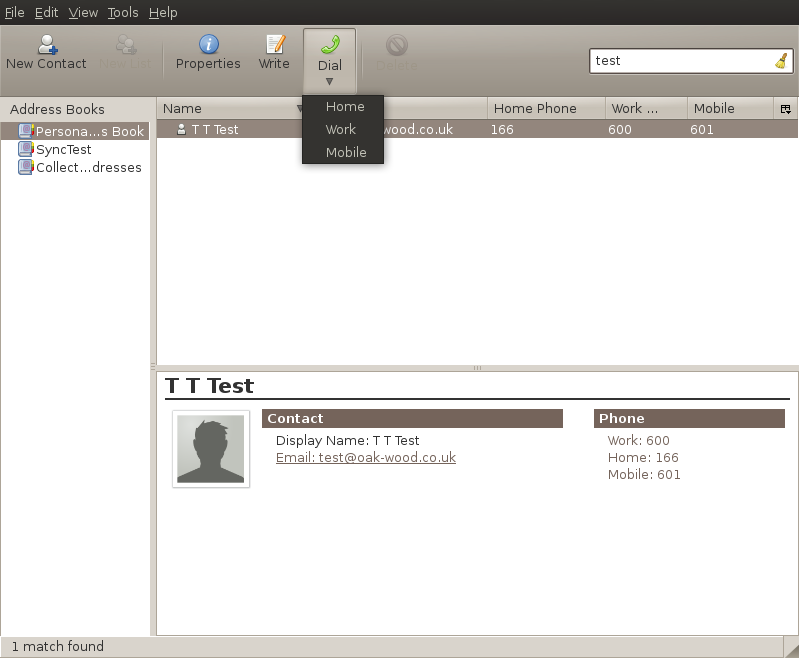
Remote control from another PC
The beauty of MPD is that it can be controlled from other PCs on the network. There is a wide range of client software available. I’ve found GMPC, combined with some of the big selection of plugins, suits my needs best. Ario is another good client, as is Minion, an add on for Firefox. The MPD website has a whole list of clients.
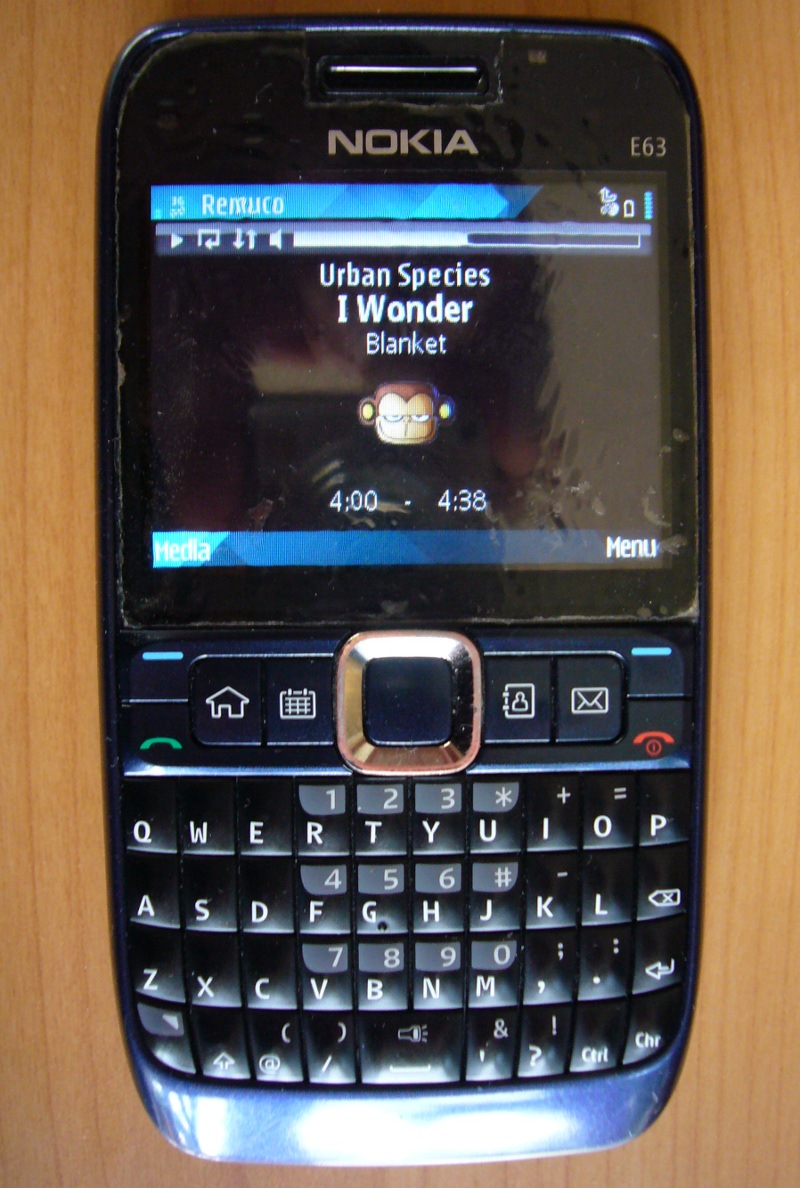
Remote control from a phone
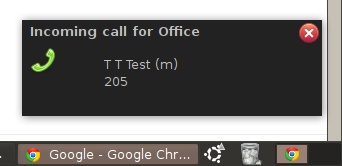
 This bit’s great! Using Remuco the music player can even be controlled from a mobile phone. Remuco is a little different to other MPD clients. It doesn’t use MPD’s interface directly, but relies on a helper application, remuco-mpd, being installed on the server (the EeePC in this case). But it works well, and is really useful as my phone is always on and to hand, whereas, believe it or not, I do occasionally turn my laptop off.
The music
There’s not much point in having a quality DAC and amp and feeding poor quality music files to it. Much of my CD collection I ripped out a few years for the purpose of playing it on an in-car CD player that played MP3s. It was done in a hurry just before a journey to the Hebrides. Tinny speakers and a noisy old diesel car meant it didn’t really matter if the quality was less than perfect, so I used bitrates of between 128 and 160kbps.
On my new set up this was really noticeable, so I set about re-ripping the whole lot. For the majority I used FLAC, a lossless compression format. Towards the end I got a bit nervous about how much disk space this was using, so some of the stuff I listen to less frequently was ripped to variable bit rate MP3 using lame’s ‘extreme’ preset setting, which produces files with an average bit rate in the 200-250kpbs range. All of this was done with Sound Juicer. For the ‘extreme’ setting I had to create a new preset, using this GStreamer pipeline:
audio/x-raw-int,rate=44100,channels=2 ! lame name=enc preset=extreme ! xingmux ! id3v2mux
So how does it sound?
Great! I’ve done some entirely subjective listening tests comparing FLAC files played over this system with the original CDs played on a Cambridge Audio Azur 340C CD player. If anything, the FLAC sounds better—a touch clearer, brighter and more defined. This isn’t surprising—the 340C is quite old now and the DAC in the DAC Magic is superior to that in the 340C. Since FLAC is lossless, the input hitting the DAC Magic should be a bit perfect copy of the CD.
I’m certainly very pleased with it, and it sure beats having to change the CD every 45minutes!